
Next in my series video editing tips, all about creating the storyline of a good video.
A good video is characterized by a clear storyline. Most people have already experienced the fact that creating a clear storyline is not always easy. That’s why, in this video editing tips article, I will pay special attention to this important step in the montage.
Us amateur video producers and editors rarely write an elaborate script before filming, describing the complete storyline. More often, we just take the camera when on vacation or at an event, and we capture everything we find interesting. The consequence is that we will have the main subjects, but no storyline.
If you watch all these recorded sequences on the computer, people will most likely not be able to understand the meaning of these images (apart from you). A clip of the front of an old building, mountains covered in snow on a vacation or a day at the beach will only mean anything when incorporated in a logical story.
If we edit these clips without thinking of a clear storyline, chances are that the sequence will not be enjoyable to watch for neutral viewers. He or she will expect the images to be presented in order to strengthen and give meaning to the sequence. It is your task as editor to create that storyline during editing.
The Collection Step
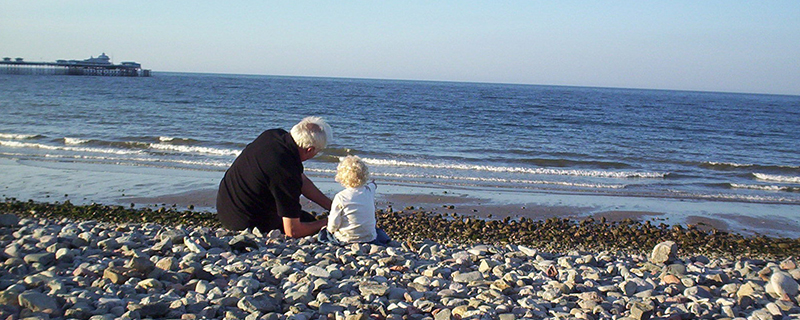
Thinking of a storyline for a video with one subject, for example a birthday or a neighborhood party, is easier than when you try to construct a continuous story for your holiday video.
In such a video, after all, there are several subjects that have to be ordered in order to create a logical complete picture. This is the reason I am using a holiday video as an example for this story.
What ever kind of video you are making, the first step is viewing the material that is available. This step is even more important when the footage has been shot a while ago, because then you can get familiar with it again.
Take your time to view the footage. Clips that are very good, remarkable or bad should receive a note at the properties of the clip in the project screen. Apart from this, you do nothing.
After viewing all the clips you can start thinking about the storyline. It is easier when you split up the holiday in several parts. You can do this in different ways.
You can, for example, use the time as main indication by splitting up footage per day or week. Besides that, it might be possible to tell the story by letting different people tell their experiences.
I choose to split up the story in subjects. Think about city trips, visits to the beach, the environment like mountains or for example life at the campsite. Whichever layout you choose, make sure there is enough material for the different parts in the montage.
When you have chosen for a layout, make specific folders in the project screen, based on time, persons or subjects. Then, you will view the footage again and order them in the specific folders. 
When that is done, you will have a clear overview of the amount of footage per subject. In case you were at the beach only for one day and you visited 10 cities, the amount of footage between subjects will differ greatly. In that case, you can choose to categorize the material even further. You can, for example, make a folder for each of the cities.
Your storyline is now beginning to take shape, because you have the subject (the vacation), the chapters (cities, beach, camping) and the timelines (individual city trips or different days or happenings at the campsite). In the next step, you will make sure these sequences begin to take shape.
What Story Do You Want To Tell?
The First thing you have to find out when composing a timeline is the most important thing you want to tell your viewers.
Sometimes this is crystal clear. When you do a day trip, starting in France to look at the Dali museum in Spain, the trip there and the dinner on the way can be interesting, but the most important thing is the visit to the museum itself. Then, the viewer has to see that.
Less simple is determining what was so special about for example the city trip to Carcassonne or the day at the beach. At Carcassonne you can ask yourself if it was the beauty of the city itself that you found interesting, the atmosphere or viewing the fundamental walls? You can ask yourself the same for the trip to the beach. Was it the heat, the crowd or the total relaxation that made the day so special?
Most often you will find the answers to these questions by simply knowing or the clips will speak for themselves. You have undoubtedly (consciously or unconsciously) filmed the most important thing.
When not a single clip speaks for itself and you can not find out the importance of it, you have to ask yourself if you really have to cover this subject. Because if it is not clear for you, it will certainly not be clear for the viewer.
That doesn’t mean you can not use the images. Shots of beautiful buildings, alleys, but also mountains and people on the beach can be used in combination with other footage for that specific day or subject.
That is the beauty of editing, we use images to create an atmosphere beneficial for the complete picture. Nobody will tell you, apart from the people that were there on the trip, that the footage is not corresponding with reality. Of course, you have to keep in mind that the total picture is correct; a shot of the beach with a clear blue sky next to a short of a clouded beach will raise questions.
Choosing The Key Shots
Now you know what you want to tell per chapter, you can start selecting clips to tell your story.
You will also do this in general terms by selecting the key shots for each of the scenes you want to use to build your sequence. The key shots will contain only the shots that are relevant for the sequence. To determine these shots, you watch the specific videos for that subject again, carefully. The key frames for the different scenes will most likely come to you by themselves. An example:
Suppose you want to display the trip to the Dali museum. In the sub folder Dali in your project window, you will find dozens of clips. After viewing these clips, you will conclude that you can divide this day in a few scenes.
You have a few clips of the trip there, a few of the city Fiqueres and the massive line in front of the museum, a lot of clips of the museum itself and to finish it off clips of the breathtaking trip back where you made a stop at the house of Dali in Cadaques. For this sequence, you have 6 scenes available to tell the story.
For each of these scenes, take the shot that tells the story for this scene.
 Depending on the editing package you use, you can assign this key shot to the thumbnail of the clip that is shown in the project view, or you can copy the clip and delete all other frames so only the key shot will remain. Then, you will paste these 6 key shots on the timeline of your project. You will do this for every sequence or chapter you want to use in your edit.
You can use different methods for ordering the sequences. Ideally, your editing package will support multiple sequences. In that case, you will construct different sequences in order to combine them to one timeline.
The big advantage of this is that you will keep a clear overview by dividing the video in different parts.
Structural Editing
When all key shots of the different scenes, divided per chapter are shown in a clear way on the timeline, you can start forming your story further by structuring these key shots. The idea behind this structural phase is to see what works and what doesn’t.
By changing around the key shots per sequence, you can now tell the story of your sequence.
The best way to define how that story is built up is by looking at your available clips. Sometimes you will want to show the climax of the story at the end, while in other situations you want to show it at the beginning.
You can show this in a chronological way by showing the trip to the museum, the museum, the city and the trip back, but you can also disregard the chronological order.
You will do this for the shots in all sequences and after that you will place the sequences themselves in a logical order. For this, you use the same principles you used in order to structure the sequence itself.
Which sequence is most important in the story? How can you work towards an important part with the help of other sequences? Often, it’s a matter of trying things out and see whether it works or not. When you view the complete timeline, you will discover what works and where you need to change something about the structure.
Working With Shots
After structuring the key shots and the sequences, the foundation of the story you want to tell is there and you can start ordering the shots of which the sequences consist of by placing complete sequences on the timeline.
Before you do this, it is wise to first save the project and then save it again under a different name. In case of emergency, you will always have the original set up of your story.
When you play the sequence now, you will notice that there are scenes which contain shots that don’t belong there. Think of adjusting the camera, unwanted shifting and shaky beginnings and endings. Cut away these images, without adjusting the ordering of the clips.
After that, you can make a selection of the shots that are filmed multiple times, because someone walked through the shot, the sound wasn’t right or you wanted to display the image in a different way.
Now choose the shots best fit for the scene, but don’t delete the alternatives unless they are really unfit.
Place the alternative shots directly above the shot you want to use on it’s own video track. After that, adjust the properties of the video track, so the clips are not shown when displaying the timeline. (if you don’t have the possibility for multiple video tracks, make a new sequence per shot to place in the alternative shots and name the sequence in a way you know which shots they contain). 
By saving the alternatives, you will always have extra footage available for further editing. You do the same for all shots of the same subject but shot from different positions. You can also use these shots later on.
Use these “clean-up” steps for every scene in every sequence.
When all scenes are cleaned-up, the storyline will become visible. At this point you can start with fine tuning the editing. How you can do that you can read in this post: Video Editing Tips: Cutting
Your comments are most welcome!


khawar khan
on 30 Jan 2013Rebekka Deforce
on 31 Jan 2013