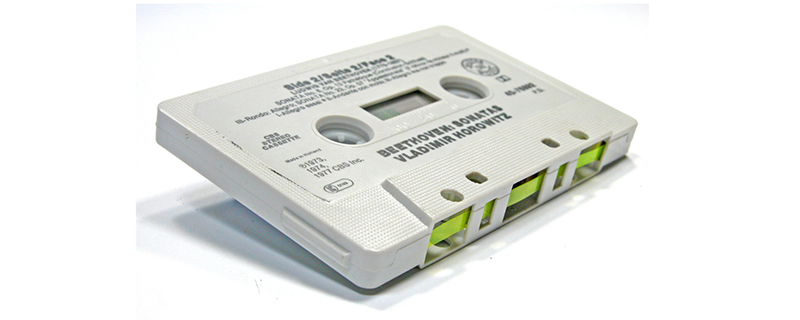
When listening to old music, faded memories usually come back to life. The fact that music from the past years is hot, is clear from the numerous radio shows and CDs that respond to this.
Perhaps even you have an excellent collection of analogue music but you don’t listen to it any more because you can’t play it on your current devices. After all, who still has a record player or cassette recorder in their living room nowadays? Yet, it’s too bad and unnecessary because it is fairly simple to digitize this music so you can listen to it on CD, MP3 and WMA players.
Also it won’t be long until the tape recorder and audio cassettes are completely vanished from our assortment, so any old music tapes or audio recordings you want to save for future generations, have to be digitized now, or will be lost forever.
Requirements
Digitizing audio tapes can be done on any average computer.
You can record audio with any type sound card. The advantage of more expensive sound cards is that they can register the audio more accurately when recording, for example in 24-bit and 192 kHz opposite to the standard 16-bit and 48 kHz.
To be able to record the audio from a tape recorder, you can connect it directly to the sound card. For this, you will generally use a cable with two RCA males and a mini-jack.
You connect the RCA males to the cassette recorder and the mini-jack goes into the input of the sound card. If everything is connected properly, you should be hearing audio from your PC speakers. If not, make sure the line input is not muted. You can check this by double clicking the speaker icon in the task bar.
For recording LPs, you will need an amplifier. The amplifier will then transfer the audio to the sound card. If you do not have an amplifier, the Audio Cleaning Lab by Magix can be a solution.
The cable you use between the amplifier and the record player has two RCA males on both sides. To transfer the audio to the sound card, you need a cable with two RCA males and a mini-jack.
Alcohol
To maintain the highest possible quality of the analogue audio, it is wise to clean the heads of the cassette recorder first with a cloth and a little bit of alcohol.
When digitizing records, make sure they are free of dust and that the needle of the pick-up is clean.
The final step before you can start is choosing suitable software. Basically, it doesn’t really matter which software you choose, as long as you can record, edit and export audio with it.
All of these functions are usually available in one package and this software is provided by the manufacturer of the sound card, but sometimes it is necessary to use an additional package because a certain file type is not supported. If you do not have the correct software yet, you can find all sorts of free packages on the Internet for all three stages of the digitization process.
If you don’t have any suitable audio software, I would recommend you to download Audacity, which is free to use.
Recording
Before you actually start recording the audio, you need to determine to which file format this should be done. Depending on the software, you can directly digitize to WAV, MP3 or WMA.
You will get the highest quality with the standard WAV format because it uses no compression. When digitizing directly to MP3 or WMA, quality is always lost due to the severe compression method which is being applied. The advantage of converting directly to MP3 or WMA is the fact that it won’t take up much disk space because of the smaller file sizes and the fact you can immediately use the files.
The best thing to do is always go for the highest quality possible for the editing phase. This means a WAV file format in the highest possible bit depth and frequency. For better sound cards, you can use a bit depth of 24 bit and a frequency of 96 kHz. However, a bit depth of 16 with a frequency of 48 kHz is also sufficient. Because the audio is registered more accurately it will maintain high quality. The clean-up operations you will perform later will then also give a better result.
Volume level
 When recording, it is best when you have the devices right next to your computer. You can then always press the record and stop buttons on time. Another advantage is that you can use short cables, which saves money and reduces loss of quality.
Always do a test recording first to optimize the volume level.
Cleaning
When you have digitized all records and audio tapes, you will notice that there is a lot of crackle, noise and mains hum in the recording. Because we are always dealing with the same sounds within the same frequencies here, it is relatively easy to remove these noises from your recording. Most audio software therefore comes with many effects to clean up the audio.
The result of these effects is often amazing when properly applied. Good headphones are recommended to avoid disturbance from environmental sounds. In most cases, you can try the effects while listening to the music. It is also wise to add the effects little by little.
If you are using more professional audio software or vst plug-ins, you will likely have the option to save your preferences. This will certainly save you a lot of time if you need to clean up a lot of music. Nevertheless, you should always listen to the result of these settings on other songs.
Exporting Audio
If you are satisfied with the result, you can start exporting the music. If you have recorded everything in WAV format, you will have the most freedom and always the best quality.
From the WAV format, you can for example export to MP3, audio CD, WMA, OGG Vorbis or audio DVD. Make sure you enter as many details about the song as possible. These details will ensure you can find your songs back in your music collection easily later on, and when playing the music you can easily see the artist or song.
Encoding Audio
When encoding into file formats such as MP3, WMA or OGG Vorbis, you will be given the option to set the bit rate. The higher the bit rate, the better the quality. The only disadvantage is that the size of the filer is larger. You can slightly reduce the file size by choosing a variable bit rate. You will however need to check whether your device can handle variable bit rates.
With most software programs, it is possible to burn music to a DVD. You can then make use of the highest audio quality possible. The files can be put onto a DVD with sample rates up to 192 kHz with a bit rate of 24. More than four hours of music will fit onto a stereo DVD while only half as much will fit onto a surround DVD.
After you have digitized your entire analogue collection, you can choose to keep the original files. If this involves heavily encoded files, this will be no problem because you can easily burn them onto a DVD as data. It becomes trickier when you have used the larger WAV format. You then have only two options to maintain the high quality. Either you save all WAV files, or you convert all these files using a lossless audio codec. In the latter case, you can make use of the free flac encoder flac.sourceforge.net or convert the files to the lossless version of WMA. For this, you can use the free Windows Media Encoder.
Audio terminology
Frequency
1 Hz (Hertz) is one vibration per second. Humans can perceive vibrations of 20 Hz to 20 kHz (20.000 Hz). Low frequencies give a low bass, high frequencies provide high tones.
Intensity (amplitude)
The intensity of audio is indicated with the unit decibel (dB). The intensity determines the volume. The lower limit of humans lies at 0 dB, while the upper limit lies around 120 dB.
Sample rate
When analogue audio is stored digitally, this is done is steps. Each step is called a sample. The number of steps per second is called sample rate. The higher the sample rate, the better the audio. In other words: the audio is registered more accurately and less distortion occurs.
The sample rate is expressed in Hertz, just like the frequency of the audio. At 8 kHz, audio becomes fairly understandable. At 44.1 kHz (44.100 kHz) we are talking about CD quality. Most DVDs have a sample rate of 48 kHz.
Bit depth
Recording and storing the amplitude of a sample is called bit depth. The higher the bit depth, the better the sound, because the registration is done more accurately.
Sound effects and what do they do?
• DeClicker: remove cracking and clicking sounds
• DeCrackler: removes constant crackling of a record
• DeNoiser: eliminates constant noises such as rumble and mains hum
• DeHisser: removes analogue tape hiss
• De-Esser: removes s-sounds
• Rumble Filter: removes low frequency rumbling.
• Spectral Cleaning: individual noise removal.
• Reverb: use for the repetition of the sound like an echo.


